|

Step 1 - Connecting to the Server
1. After installation of FileZilla, open it and type in the following information in the upper right corner of the window:
Address |
e.g. "ftp.yourdomain.com" |
User |
If your domain is "abc.com", type in "abc" |
Password |
Password in the account information e-mail |
Port |
Leave it blank |
2. Click <<Quickconnect>> to access the server. (If the connection is failed, please make sure the information your entered is correct.)
Step 2- Uploading Files

1.
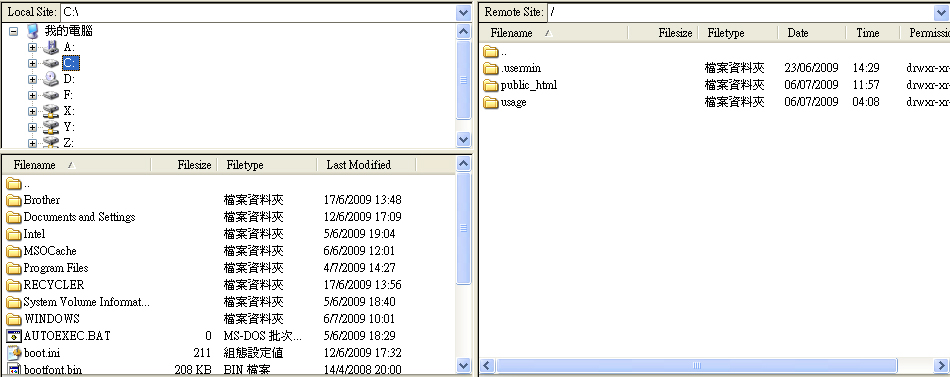
The left side of the window is the Local System (PC) while the right side is Server Side.
2. Select the right folder in the Server Side before uploading files. Left Click twice over the files you want to upload. Remember to upload the web files to the folder "public_html".
3. You can download the files from the Server Side to your PC. The download method is similar to the upload one.
4. If you want to upload a batch of files, press "Shift" on your keyboard and select multiple files. 5.
You can upload the whole folder including the files inside to the Server.
6. If the Server Side has the same file existed, the window below will appear:
Choose an action you want.
Step 3 - Other Questions
1. Why There Is "Fobidden" Message After My Upload?
- You may upload the files outside the folder" public_html".
|
- You may forget to upload a file called "index.htm / index.html". Be aware of the spelling of the file names.
|
- You may make wrong attributes to the files. Change the attributes by following the instructions in Item 4 "File Attributes".
|
- You can press "Refresh" on the browser when the web pages are updated.
|
2. Why I Cannot Upload Files?
- Due to the firewall set in your computer, you may not upload files to the Server successfully.
|
| |
1. Select <<Edit>> on the menu of FileZilla and then select <<Settings>>:
|
| |
 |
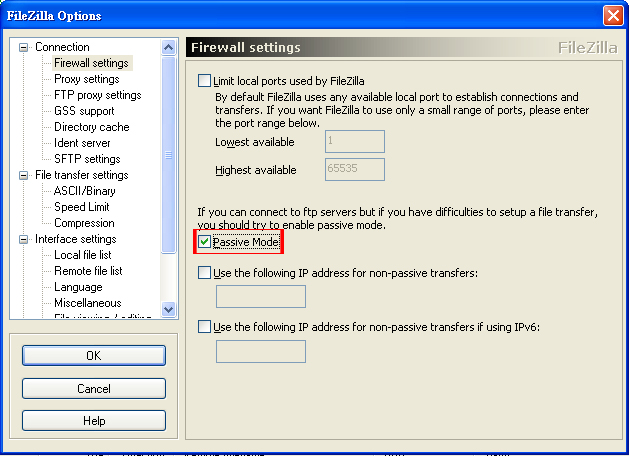
2. Select <<Connection>> on the left side and then select <<Firewall Settings>>. |
| 3. Choose <<Passive Mode>> and click <<OK>> to upload the files. |
3. How to Change File Attributes?
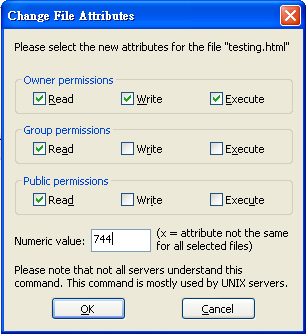
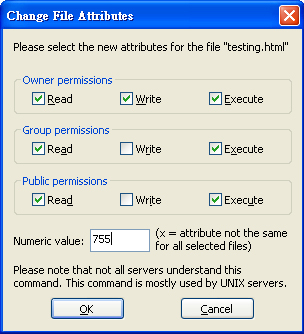
Right Click over the files in the Server Side and then select <<Change File Attributes>>:
HTML & Folder
Attributes
(744) |

|
CGI & Folder
Attributes*
(755) |

|
* For uploading CGI files, please remember to use ASCII mode. Click here for more information.
|