1. Log in DirectAdmin
To access DirectAdmin - For most of our clients, you simply add ":2222" following your domain through the connection of "https". For example, if your domain is "abc.com", please type https://www.abc.com:2222 in your browser.
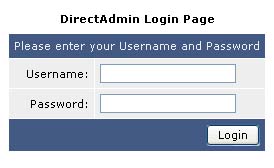
Enter your Username and Password according to the "Account Information" we sent to you
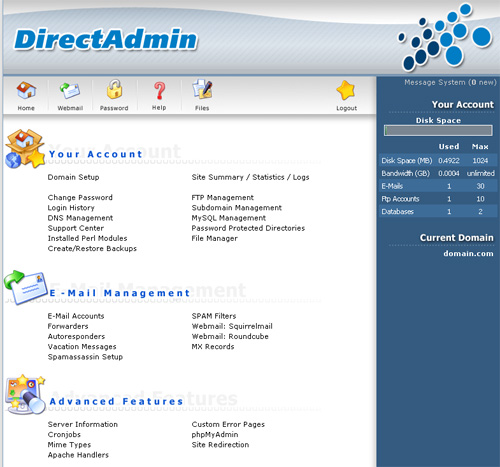
The interface of DirectAdmin
2.
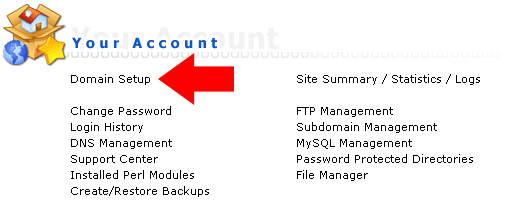
How to Add Domain?
Step 1 - Click <<Domain Setup>>.
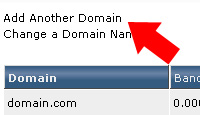
Step 2 - Click <<Add Another Domain>> to add a domain.
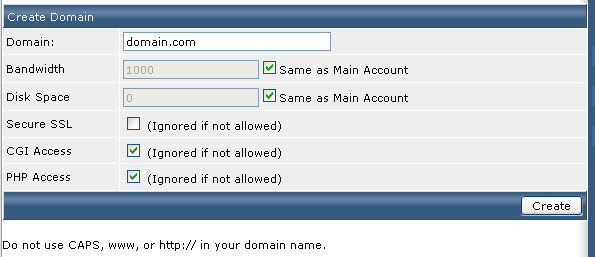
Step 3 - Enter the following information and then click <<Create>>:
| Domain |
Your domain, e.g. "domain.com" |
| Bandwidth |
N/A |
| Disk Space |
Enter the number to limit the space of the domain, e.g. entering "100" means that this domain has 100MB web space |
| Secure SSL |
N/A |
| CGI Access |
CGI files are allowed to access or not |
| PHP Access |
PHP files are allowed to access or not |
Step 4 - After adding the domain, please make changes into "ns5.keynet-hk.com" and "ns6.keynet-hk.com" on the DNS settings of the domain. If you are using the domain registered by our company, please refer to "Guide to Use Domain Accessment" and "Guide to Use DNS-DIY Domain Accessment" (Chinese only).
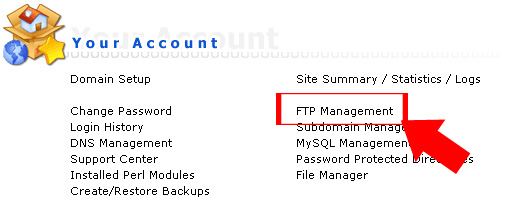
3. How to Create A New FTP Account?
Step 1 - Click <<FTP Management>>.
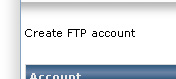
Step 2 - Click <<Create FTP Account>>.
Step 3 - Input the information and click <<Create>> to save:

Remarks: If your domain is "abc.com" while your DirectAdmin username and new FTP account username are "abc" and "testing" respectively, selecting different options means the new FTP account mapping to different directories:
| Domain |
/home/abc/domains/abc.com/ |
| Ftp |
/home/abc/domains/abc.com/public_ftp/ |
| User |
/home/abc/domains/abc.com/public_html/testing/ |
| Custom |
As you like |
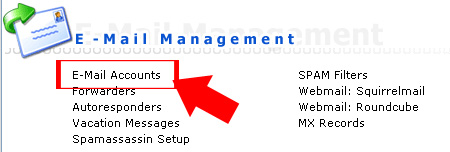
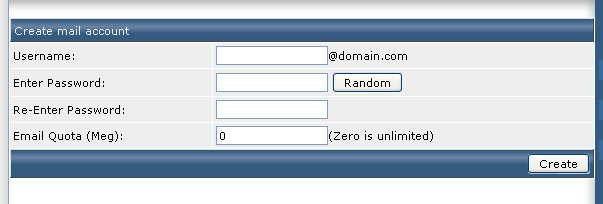
4. How to Create a New Email Account?
Step 1 - Click <<E-mail Accounts>>.
Step 2 - Click <<Create mail account>>.

Step 3 - Enter the information below and click <<Create>>:
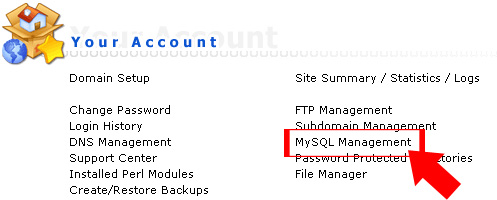
5. How to Create a New Database?
Step 1 - Click <<MySQL Management>>.
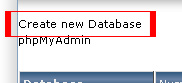
Step 2 - Click <<Create new Database>>.
Step 3 - Type in the information and click <<Create>> to create a new database:
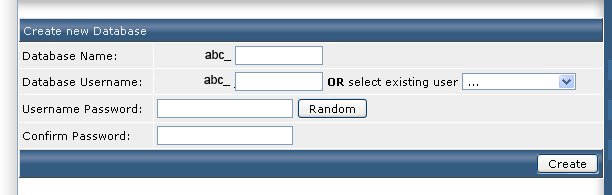
Remarks: To access phpMyAdmin, please type the database username and password you set here instead of the password logging in DirectAdmin.
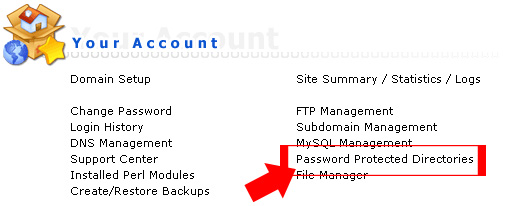
6.
How to Use .htaccess to Password Protect Directories?
Step 1 - Click <<Password Protected Directories>>.
Step 2 - And then click <<Find a Directory to Password Protect>>.
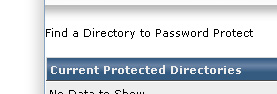
Step 3 - Select a directory that you want to use password protect and then click <<Protect>> under "Action".

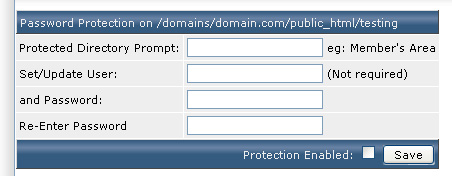
Step 4 - Type in the information as below. Tick <<Protection Enabled>> and click <<Save>>:
| Protected Directory Prompt |
Sentences for notification, e.g. "Please Login" |
| Set/Update User |
Username needed for login |
| and Password |
Password |
| Re-Enter Password |
Enter password again |
|